Swagger + OAuth2
목표
- swagger에서
- google oauth를 swagger authorize ui에 적용
- 인증된 Token을 각 API에서 Header에 설정 할 수 있도록
custom open api
from fastapi.security.oauth2 import OAuth2AuthorizationCodeBearer
from fastapi.openapi.models import OAuthFlows as OAuthFlowsModel, OAuthFlowAuthorizationCode
from fastapi.openapi.models import SecurityScheme as SecuritySchemeModel
from fastapi.openapi.utils import get_openapi

# --------------------------------------------------------------
# Google oAuth2
CLIENT_ID = "...알아서"
CLIENT_SECRET = "...알아서"
TOKEN_URL = "...알아서"
AUTHORIZATION_URL = "...알아서"

class OAuth2Google(OAuth2AuthorizationCodeBearer):
    def __init__(self):
        super().__init__(authorizationUrl=AUTHORIZATION_URL, tokenUrl=TOKEN_URL)

oauth2_scheme = OAuth2Google()

# --------------------------------------------------------------
# Auth for Swagger
def custom_openapi():
    if app.openapi_schema:
        return app.openapi_schema
    openapi_schema = get_openapi(
        title="FastAPI with Google OAuth2",
        version="1.0.0",
        description="This is a FastAPI application integrating Google OAuth2",
        routes=app.routes,
    )
    openapi_schema["components"]["securitySchemes"] = {
        "OAuth2Google": {
            "type": "oauth2",
            "flows": {
                "authorizationCode": {
                    "authorizationUrl": AUTHORIZATION_URL,
                    "tokenUrl": TOKEN_URL,
                    "scopes": {
                        "openid": "OpenID Connect",
                        "email": "Access to your email address",
                        "profile": "Access to your basic profile info"
                    }
                }
            }
        }
    }
    app.openapi_schema = openapi_schema
    return app.openapi_schema

# open api 변경
app.openapi = custom_openapi
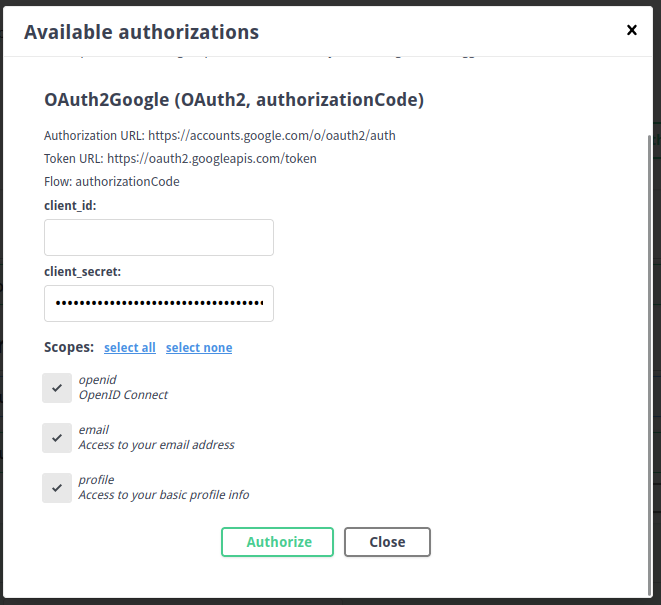
이런 간단한 코드로 아래와 같은 훌륭한 화면을 도출 해 낼 수 있었으나.
 |
|---|
| custom 적용된 Swagger auth modal window |
API에 Header 파라미트 적용하기
 |
|---|
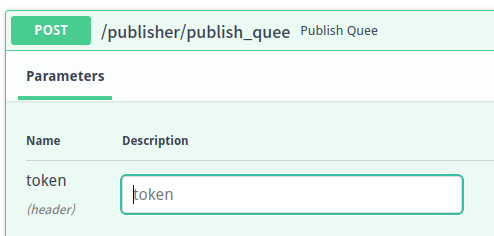
| API 파라미터에 Header를 선언한 모습 |
select된 부분이 Swagger에게 Header에 입력할 값을 알려주는 부분이고..
 |
|---|
| API 화면에서 입력하는 부분 |
위 사진처럼 입력은 할 수 있지만.. 모든 API에 저렇게 선언해야 한다고?
이 부분은 좀 찾아봤는데 뾰족한 부분을 못찾았다.
Client credentials location
 |
|---|
| FastAPI security first step에 있는 이미지 |
문제는
- Google Login은 잘되는데
- Swagger Auth..의 응답으로 id_token을 잘 반환하는데
- 그걸 Web Browser 개발자-network-tab에서 복사해서 써야하나?
당연하게 Swagger가 친절하게 Header에 어떤 변수로 넣어줄 것을 기대 했다.
저 이미지에 있는 Client credentials location을 화면에 나오게 하려고 말이다.
oAuth Flow
 |
|---|
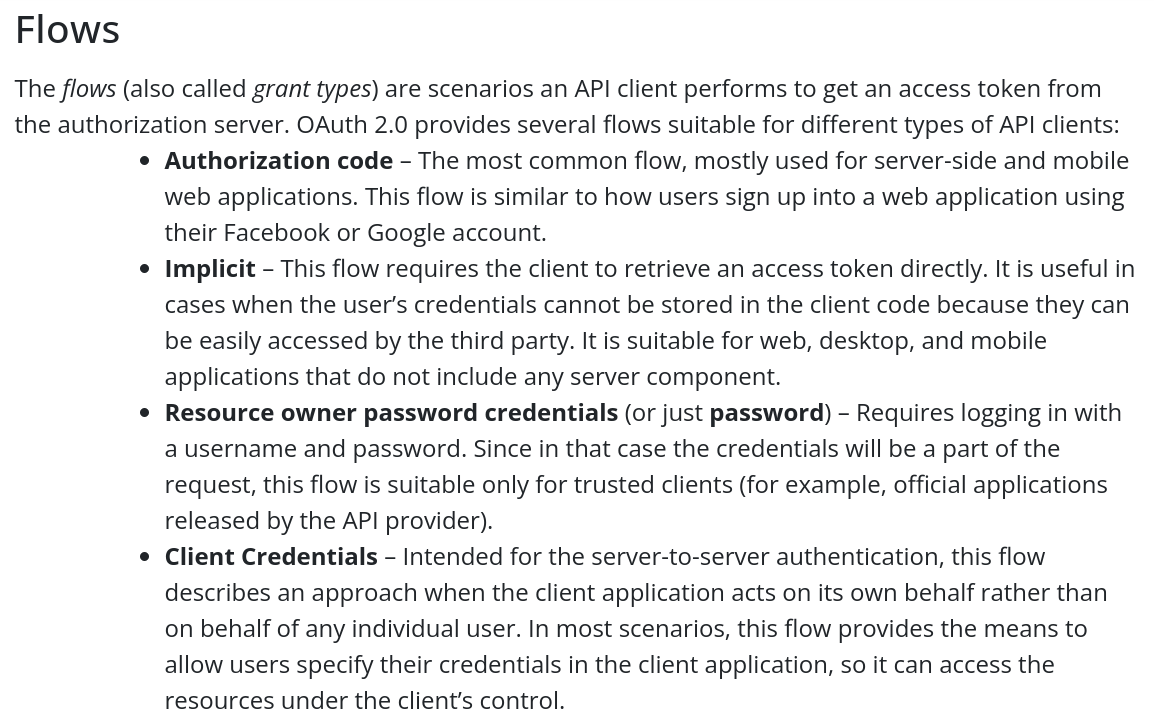
| Swagger에 있는 flow관련 설명 |
Swagger에 있는 flow관련 설명을 읽어보고 또 읽어보면 저 4개의 flow중 하나를 사용하는 방식으로 이해했다.
bearer
from typing import Annotated

from fastapi import Depends, FastAPI
from pydantic import BaseModel
from fastapi.security import OAuth2PasswordBearer, OAuth2PasswordRequestForm
from fastapi.security import OAuth2AuthorizationCodeBearer

app = FastAPI()

oauth2_scheme = OAuth2PasswordBearer(tokenUrl="token")
# oauth2_scheme = OAuth2AuthorizationCodeBearer(tokenUrl="token", authorizationUrl="auth")

@app.get("/items/")
async def read_items(token: Annotated[str, Depends(oauth2_scheme)]):
    return {"token": token}

@app.post("/token")
async def login(form_data: Annotated[OAuth2PasswordRequestForm, Depends()]):
    return {"access_token": "1234", "token_type": "bearer"}
결국… FastAPI에서 제공하는 2개의 baerer를 가지고 실행해보고 검토해보면. Swagger를 이용해서 개발을 할 것인지 여부에 따라 코드가 많이 가감되어도 되겠다 싶다.